Apr 20, 2009

Welcome Baby

Let me first clarify, I'm not having a baby! Mom, calm down! LOL. I just thought this was a cute card to make and I have a few friends at work who are expecting, so I decided to make it. I use the All in the Family stamp set, which you will literally be able to mix and match heads and bodies to make a thousand (ok, maybe a slight over exaggeration) different kids and adults to fit your needs! Words of wisdom though, get yourself a Stamp-a-ma-jig so you can make sure you are putting the "heads" of your people on correctly. It took me three tries to get this baby to look right! Hope you all had a fabulous weekend!

Supplies:
Paper: Certainly Celery, Apricot Appeal, Whisper White, SAB Delicate Dots DSP
Ink: Black Stazon, Certainly Celery
Stamps: All in the family, Warm Words
Accessories: Certainly Celery Grosgrain Ribbon, Ticket Corner Punch

Apr 16, 2009

Dang it, not AGAIN???

At least that is what I hope you *ARE NOT* saying about this card. Yes, I know, it's 3 cards with the same stamp set in a row. But look at it this way, if you have this set, or wanted to purchase it (which you can do by emailing me), you will have at least 3 ideas for future cards! See I really do care about all of my cyber pals!


I will have a different card for you tomorrow, I promise!


Supplies:

Paper: Kiwi Kiss, Chocolate Chip, Whisper White and more of that DSP that I can't remember the name of...

Ink:Kiwi Kiss, Tango Tangerine

Stamps: Fifth Ave Floral, I don't know what set the "Thanks" is from. This happens when I don't put my stamps back with their mates, and leave them loose on my desk...(((sigh)))

Accessories: Chocolate Chip Grosgrain ribbon, white brads, scallop circle punch, and circle punches


Apr 14, 2009

More Fifth Ave. Floral

I made several cards with this set when I FINALLY got to sit down and do some card making over the weekend! I was nice to get 5-6 things made at one time. It sure will help me keep in touch with all of you better! I really do love this set!

I've added a CBox on my blog, so should any of you have any questions you want me to answer, feel free to leave them there! I'll answer them ASAP!


Supplies:

Paper: Regal Rose, Whisper White, Perfect Plum, DSP (I can't remember the name of it )

Stamps: Fifth Ave. Floral

Ink: Regal Rose, Kiwi Kiss

Accessories: Regal Rose ribbon, white brads

Apr 13, 2009

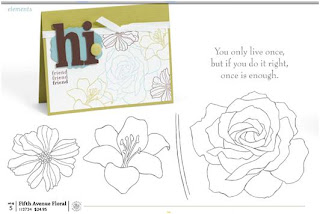
Fifth Avenue Floral

I just *had* to have this set from the new catalog. That's the worst (if there is a worst) thing about loving Stampin' Up as much as I do, I just *feel* the need to own each and every new stamp set that comes out in the new catalogs. Now, this isn't good business ( Thanks John from SIMB) for setting me on the right course! I will have to buy less stamp sets each year, but my business will become profitable where it only helped support my *habit* before! So this is one of the sets that I will be demonstrating with frequently until it retires! And of course, I'm totally in love with the Big Shot and Butterfly dies! This card uses the current In colors, I will be sad to see these go! Hope you had a great Easter!


Supplies:
Paper: Tango Tangerine, Riding Hood Red, Whisper White
Ink: Tango Tangerine, Riding Hood Red, Kiwi Kiss, and Whisper White Craft Ink
Stamps: Fifth Avenue Floral
Accessories: Eyelet Border Punch, Buttons, Butterfly Sizzix Die, Clear Rhinestone Brad, White Embossing Powder


Apr 2, 2009

Tutorial Thursday-Watercoloring

Welcome to Tutorial Thursday! I'm going to be bringing you a new tutorial each and every Thursday. This week's episode is devoted to Watercoloring with Stampin' Up inks and watercolor paper. Let's get started

I have decided to watercolor the great rose image from Fifth Avenue Floral using Riding Hood Red ink, watercolor paper and my aqua painter.


I have used Memento Tuxedo Black ink, however you can also use Black Stazon to stamp your image onto watercolor paper.
If you squeeze your ink pad, you will have some ink transfer onto the top of your ink pad. Using the aqua painter, squeeze a little water into the ink to make a puddle of ink and water.

I used the aqua painter to outline the black lines of the flower with the Riding Hood Red ink.

I finished by filling in the rest of the flower, blending the lines with the ink. Let the flower dry before cutting out.
Finish assembling card, add embellishments and you have a beautiful watercolored masterpiece! Hope you enjoyed. If you would like to see a certain tutorial next week, leave me a comment and I will choose one to showcase next!